Monday, November 30, 2015
Disney: 3D
For this project, we used the website Tinkercad to design something to print with a 3D printer. I decided to make a replica of Minnie Mouse! This was a cool experience because I got to see how 3D printers really work. Tinkercad was difficult to navigate, but after a lot of practice and tutorials I finally got the hang of it. I used available shapes like spheres and butterflies to get the right look. I had to create holes on the back so that the piece would print on a flat back. This way, the design would have something to adhere to and not sink down. I'm glad I got to see how these machines work because they are a new developing technology that we will definitely see more of in the future.
Friday, November 20, 2015
Tuesday, November 17, 2015
Squeaky Clean
For this project, we were required to use nontraditional art materials. I decided to use rubber bands because I had a large 1/2 pound bag of them at home. After thinking through some ideas, I decided to make a rubber duck out of rubber bands. (Cute right?) I used the idea of twilling to curl rubber bands of different colors and sizes into small swirls. I glued these down until they formed the shape of a duck. This was a struggle because the rubber bands were very hard to work with, especially the thin ones. I quickly ran out of usable ones and had to find more. After weeks of endless glue gun burns and frustration, I finally finished the duck. For the background, I decided that since it was a rubber duck, he needed a bubble bath. I covered up the duck and blew bubbles mixed with food coloring to create colorful bubbles. I had to experiment with this effect to figure out the best way to get an actual bubble shape, not just splatters from the bubbles popping. This turned out to be a mess, but I finally decided to cut out some of the best bubbles and glue them to my background as well to create a layering affect. If I could do anything different, I would've not chosen rubber bands (because I do not like them anymore) and I would've tried to find a way to make the glue less visible on the final product.
Tuesday, November 10, 2015
Playing with Proportions
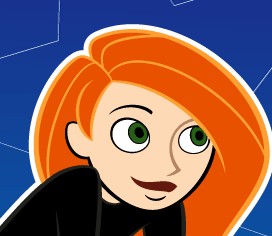
For this project, I morphed Emma Stone to look like Kim Possible because she has red hair also. I rounded her face, volumized her hair, rounded and enlarged her eyes, straightened out her smile, minimized her ear, and gave her a turtleneck. I wish that the liquify tool didn't add as much distortion and blurriness as it did, but I like the exaggerated proportions. I don't feel pressured by society to appear a certain way because I'd rather be myself.
Friday, November 6, 2015
Pink Pig: Parts of a Whole
For this project, I created a pig by combining different objects to form the proper shape. I began by choosing to make a pig, and I decided to fill it with things that are pink. After creating this collage by warping, resizing, and adjusting the hue of these images, I created a whole picture out of many tiny ones. I added in the purple to pink gradient for the background because it enhanced the pig and added fluidity. My favorite part is the face! It was a little difficult to get the collage of images to look like one animal, but I think changing it so they were all around the same value of pink helped.
Monday, November 2, 2015
Altered portraits
This is an altered portrait I created in photoshop. I used black line brush to erase the picture, but with combined masks the picture actually appeared. This was not my favorite assignment, but I did like the picture better with a black background.
Subscribe to:
Posts (Atom)


